No Sew Decorative Pillow DIY
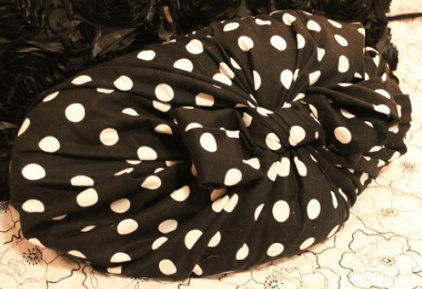
I needed another decorative throw pillow for my oldest daughter, Ella's bed. I will admit that I AM the craft queen, but can barely sew a button on to save my life. I had leftover fabric from her window corness which will make for a nice accent pillow to bring it all together. This pillow is simple to make and it looks just like it came from Pier 1.
Supplies
:: Square soft pillow
:: About 1 yd Fabric
:: Scissors
DIY Steps
{Step 1} Lay the fabric out with the rough side facing up.
{Step 2} Place the pillow square onto the fabric.
{Step 3} Cut the fabric about 6″ away from the edges of the pillow on all four sides.
{Step 4} Grab two ends diagonal from each other and tie a knot tightly in the middle. You can pull as tightly as you would like. The tighter you pull the more oval shape the pillow.
{Step 5} Repeat with the other two diagonal ends.
{Step 6} Tuck the ends into the knot to make a bow. My knots were tight enough to hold the bow in place. For extra security, you can just use a dab of hot glue.
Project Cost
You can purchase a square throw pillow for around $2 at Ikea or you can use one that you already have around the house.
A yard of fabric is about $1.99 for a yard if you purchase from the “scrap” section along with using a 40% off coupon. This project will cost around $4 if you have to purchase the items with discounts.
Can't wait to see your custom creations!
PrintNo Sew Decorative Pillow DIY
Ingredients
- Square soft pillow
- About 1 yd Fabric
- Scissors
Instructions
- Lay the fabric out with the rough side facing up.
- Place the pillow square onto the fabric.
- Cut the fabric about 6″ away from the edges of the pillow on all four sides.
- Grab two ends diagonal from each other and tie a knot tightly in the middle. You can pull as tightly as you would like. The tighter you pull the more oval shape the pillow.
- Repeat with the other two diagonal ends.
- Tuck the ends into the knot to make a bow. My knots were tight enough to hold the bow in place. For extra security, you can just use a dab of hot glue.


