How to Make a Bulletin Board for Kids Room
I had a leftover box from Christmas that held a mixer. I used that to make this bulletin board since it was a very thick box. You will need something similar for this project. You could also use a piece of plywood cut to size.
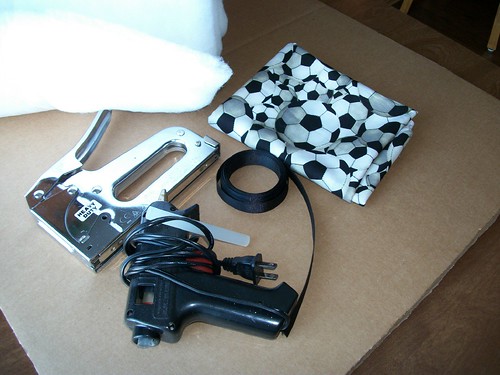
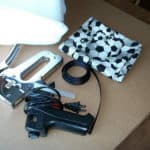
Bulletin Board Materials
- Heavy Box or Plywood, 24″ x 24″
- Batting, 26″ x 52″ or (2) 26″ x 26″ pieces
- Ribbon, 5′ yard
- Decorative Beads (optional)
- Staple Gun
- Glue Gun
Bulletin Board Assembly Steps
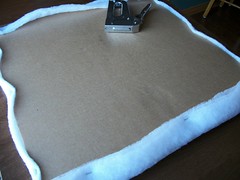
{Step 1} Lay the batting down on table and center the cardboard on top of batting, making sure that there are at least 2 inches of batting on all four sides of cardboard.
On the center of each square, pull the batting up and over the cardboard and staple. Do this on all 4 sides. Then go back and start to staple in between until all sides are stapled down.
{Step 2} Lay your material face first down on table and center the batting cardboard on top of the material, making sure that there are at least 2 inches of material on all 4 sides of the batting. Staple into place using the same format that you did with the batting.
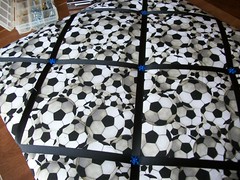
{Step 3} Lay the ribbon from one corner to the other, leaving about 2 inches on both ends to overlap the material.
Cut off and do the same with the opposite corner to corner. Turn the board over and staple all four corners, pulling tight before your staple. You will have an X on the front side of the board.
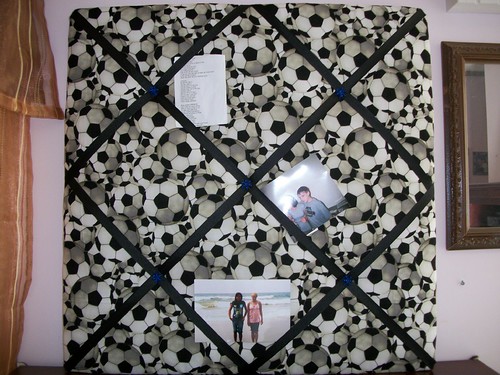
{Step 4} From the center of your X, measure 8″ down toward each point of your board and this is where your next piece of ribbon goes. You will need 4 pieces of ribbon. This will form a box with an X in the middle. Staple all pieces of ribbon into place on the back side of the board.
{Step 5} Where the ribbons meet, hot glue the decorative beads or buttons (if you are using them).
{Step 6} Add either a picture hanger to the back of the board, velcro or 2-sided tape to mount on the wall.
To make a smaller board, make sure that your material and batting is at least 2 inches larger than your board. This will ensure it will wrap around to make seamless edges. Follow the same directions.
PrintHow to Make a Bulletin Board for Kids Room
Ingredients
- Heavy Box or Plywood, 24″ x 24″
- Batting, 26″ x 52″ or (2) 26″ x 26″ pieces
- Ribbon, 5′ yard
- Decorative Beads (optional)
- Staple Gun
- Glue Gun
Instructions
- Lay the batting down on table and center the cardboard on top of batting, making sure that there are at least 2 inches of batting on all four sides of cardboard.
- On the center of each square, pull the batting up and over the cardboard and staple. Do this on all 4 sides. Then go back and start to staple in between until all sides are stapled down.
- Lay your material face first down on table and center the batting cardboard on top of the material, making sure that there are at least 2 inches of material on all 4 sides of the batting. Staple into place using the same format that you did with the batting.
- Lay the ribbon from one corner to the other, leaving about 2 inches on both ends to overlap the material.
- Cut off and do the same with the opposite corner to corner. Turn the board over and staple all four corners, pulling tight before your staple. You will have an X on the front side of the board.
- From the center of your X, measure 8″ down toward each point of your board and this is where your next piece of ribbon goes. You will need 4 pieces of ribbon. This will form a box with an X in the middle. Staple all pieces of ribbon into place on the back side of the board.
- Where the ribbons meet, hot glue the decorative beads or buttons (if you are using them).
- Add either a picture hanger to the back of the board, velcro or 2-sided tape to mount on the wall.



Oh my goodness! This is such a great idea and great use of the empty box! I have some heavy cardboard that will work perfectly. I want to run out and get some materials right now!
Susan
I know you will have fun with this project. Where ever you decide to put it, it will look great. Make smaller ones and give to friends
Andrea:
Such a fun idea!!
Sounds fun! But where is the place to get the best batting?
Lilly, I’ve picked up batting at Michael’s Craft store – use the 40% weekly coupon to save more on it too!