Pottery Barn Pink Love Frame DIY Project
The following is a guest DIY from my friend, Emily. It's totally adorable!
Who doesn’t love Pottery Barn Kids and their timeless style that gets more and more precious with each magazine? I am a bit obsessed with playing copycat to all their new designs.
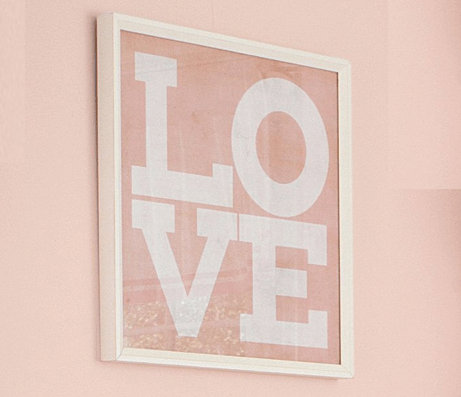
The newest inspiration is this beautiful LOVE Frame for my twin girls’ room. I never seem to do it exactly the same but close enough for a tiny fraction of the price. This LOVE Art retails online for $149! I was able to make mine for FREE with stuff I already had around the house!
Gather just a few essentials for this adorable project.
:: Frame
:: Tissue paper
:: Tape
:: Scrapbook paper and stencils or a cutting machine like the Cricut
When choosing a frame, bigger makes a better statement, but any size will do. The 11 x 14 frame worked best for the area I wanted to hang the frame.
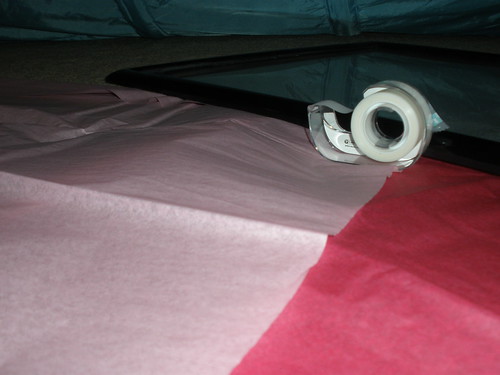
{Step 1} Start by wrapping the background of the frame in tissue paper. This provides the background.
Pink tissue paper matched the room and kept it consistent with the model. Layering light pink on top of darker pink gave the coloring a little depth while still keeping it light.
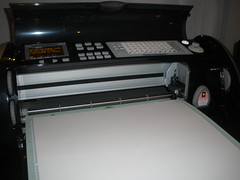
Using the Cricut is an easy way to get an amazing result. Stencils work just as well, but in my opinion any cutting machine is the way to go.
I thankfully had found mine the day after Thanksgiving in ’09 for SUPER cheap ($65 at my not so fave store, WalMart) and only buy closeout cartridges (no more than $15 each-found at Michael's, Menards or online). This is a great tool to have around.
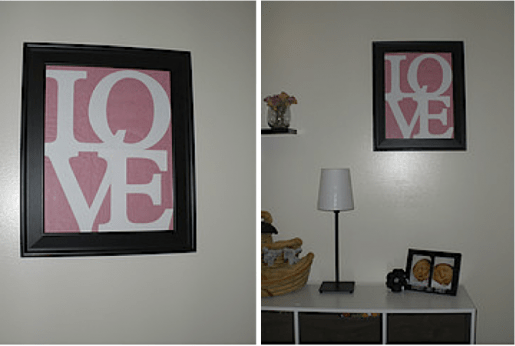
{Step 3} Tape the letters onto the frame however you would like. The model shows all letters separate, but I thought it would be just as cute to overlap the letter as art.
I can get an entire package of multiple colors of scrapbook paper for as little as $3.99 (50 pages) at Target, Michael's or even online.
Here is the frame hanging in the twins’ room. Pretty cute I must say.
DIY vs BUY Comparison
This DIY cost absolutely nothing since all of the supplies were on hand. If you were to purchase everything, including the Cricut, you would spend more out of pocket. But, you would also have the Cricut to use again to use on other projects.
If you chose to use stencils instead, you would spend around $10 on the frame, scrapbook paper and tissue paper. Still WAY less than the $149 Pottery Barn Kids sticker price! Now where can I spend that extra $149 I didn’t spend on art?? ;)
PrintPottery Barn Pink Love Frame DIY Project
Ingredients
- Frame
- Tissue paper
- Tape
- Scrapbook paper and stencils or a cutting machine like the Cricut
Instructions
- Start by wrapping the background of the frame in tissue paper. This provides the background.
- Pink tissue paper matched the room and kept it consistent with the model. Layering light pink on top of darker pink gave the coloring a little depth while still keeping it light.
- The fun part is using my Cricut cutting machine to cut out the L O V E letters. Cut out the letters. My letters are 8 inches each so I could overlap them in the frame.
- Using the Cricut is an easy way to get an amazing result. Stencils work just as well, but in my opinion any cutting machine is the way to go.
- I thankfully had found mine the day after Thanksgiving in ’09 for SUPER cheap ($65 at my not so fave store, WalMart) and only buy closeout cartridges (no more than $15 each-found at Michael's, Menards or online). This is a great tool to have around.
- Tape the letters onto the frame however you would like. The model shows all letters separate, but I thought it would be just as cute to overlap the letter as art.




Love this.. and you could make a similar sign for a bar area that says VINO. :)
Thanks for sharing the idea and how-to!
That is so cute! Thanks for the great idea!
Love. Love. Love.
(Pun intended!)
I think I will do my kids’ names!
I LOVE this! In fact, I like yours better than Pottery Barn’s LOL
I love how this turned out! It’s simple yet beautiful. I would love it if you’d link this up to the Frugal Crafty Home Blog Hop–we love to see frugal projects like this! Thanks!!
How pretty! What a fun craft idea, it looks so cute!
How stinkin’ cute! I feel like most of the time DIY projects looks better anyway!
I love knock-off projects, and I’m with you on the cutting machine! I just pinned this onto my Valentines board. Thanks for linking up this week to our Lovely Ladies link party :)
-Molly from Just a Little Creativity
This is wonderful! I’m still looking for ideas for my Valentine’s Day mantel, so this is a great inspiration for me!
Looks fantastic, really like how your letters turned out.
This is so cute, featuring it tonight over at Showcase Your Talent Thursday, thanks for linking up!
Thank you, Emily!! I love the Showcase Your Talent linky!