Cupcake Onesie DIY
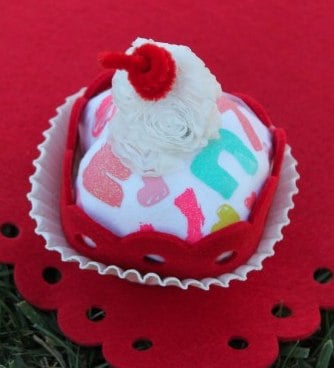
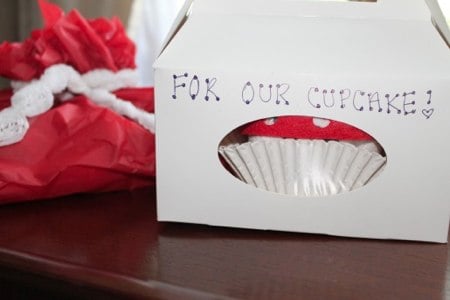
It feels like my friends and family are never ending baby makers these days. I get so sick of scrounging through Babies R Us with that silly registry……I saw a different take on the perfect little baby gift and HAD to recreate it in my own unique way. This one was for our beautiful goddaughter.
Cupcake Onesie Supplies
:: Large Muffin Cup
:: Infant Onesie
:: 3 Facial Tissues
:: Packaging Tape/Double Sided Tape
:: Rubberband
:: Decorative Ribbon/Felt
:: Red Pipe Cleaner
DIY Steps
{Step 1} Stack the tissues on one another and crumble into a tight ball.
{Step 2} Lay out the onesie and fold in the sleeves to make a square.
{Step 3} Place the ball in the middle of the “square” and fold in each corner over the ball.
{Step 4} Use A LOT of tension and hold the “cupcake ball” as tight as you can. Feel free to use a rubber band to secure and them double secure it with some heavy duty packaging tape.
{Step 5} Place the cupcake in the muffin cup. I used a bit of double sided tape to secure the cupcake to the cup for added support.
{Step 6} Wrap some decorative ribbon on the top and secure with double sided tape to give the illusion of icing. Rolling up the pipe cleaner is a fun look for the cherry too.
{Step 7} Add any other decorations to make it uniquely your own.
Project Cost
I found the onesie at a local baby store on sale for 3 of them for $9.99. I also had to buy a “cupcake holder” from my local craft store for $1.99.
All the other supplies I had around the house….but can be easily purchased throughout the year at your local craft stores to keep handy for projects like these!
PrintCupcake Onesie DIY
Cupcake Onesie DIY
Ingredients
- Large Muffin Cup
- Infant Onesie
- 3 Facial Tissues
- Packaging Tape/Double Sided Tape
- Rubberband
- Decorative Ribbon/Felt
- Red Pipe Cleaner
Instructions
- Stack the tissues on one another and crumble into a tight ball.
- Lay out the onesie and fold in the sleeves to make a square.
- Place the ball in the middle of the “square” and fold in each corner over the ball.
- Use A LOT of tension and hold the “cupcake ball” as tight as you can. Feel free to use a rubber band to secure and them double secure it with some heavy duty packaging tape.
- Place the cupcake in the muffin cup. I used a bit of double sided tape to secure the cupcake to the cup for added support.
- Wrap some decorative ribbon on the top and secure with double sided tape to give the illusion of icing. Rolling up the pipe cleaner is a fun look for the cherry too.
- Add any other decorations to make it uniquely your own.

