Yarn Bottle DIY Decoration
Recycling at it's finest for this great home decoration.
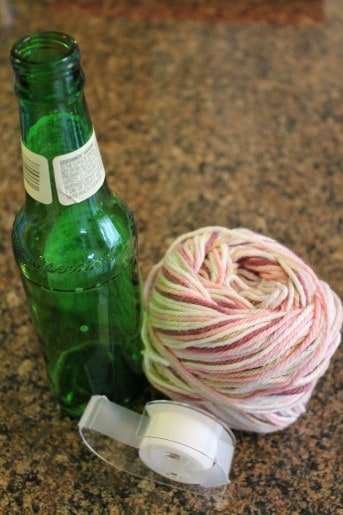
Yarn Bottle Supplies
:: Bottle (I love the shape of a beer bottle once wrapped)
:: Yarn
:: Tape
:: Glue
:: Scissors
DIY Steps
{Step 1} Start at the bottom and tape a section of the string to the bottle. I started a bit higher on the bottle to compliment the green that matched the yarn.
{Step 2} Begin the endless wrapping of yarn all the way around the bottle. Make sure to wrap tight and even all around so that your bottle won't have any crazy holes. It may have some imperfections….but that gives it character! *wink*
{Step 3} With constant wrapping it took me a good 10 minutes to get towards the top. I was watching DVR….us women need to multi task at all time!
{Step 4} Glue the end and let dry!
The tricky part is holding it all together while trying to glue the find end down. Find a friend if need be or wedge the bottle between your knees for better control.
A super unique but beautiful piece of art that will compliment ANY decor depending on the yarn used! I loved the colors I chose to go perfectly in the bubble gum room of my oldest!
Project Cost
This cost nothing since I had everything on hand already. If you need to purchase yarn, you'll pay around $3. Don't forget to use a craft store coupon!
If you have any questions, please leave a comment so I can help you out!
PrintYarn Bottle DIY Decoration
Yarn Bottle DIY Decoration
Ingredients
- Bottle (I love the shape of a beer bottle once wrapped)
- Yarn
- Tape
- Glue
- Scissors
Instructions
- Start at the bottom and tape a section of the string to the bottle. I started a bit higher on the bottle to compliment the green that matched the yarn.
- Begin the endless wrapping of yarn all the way around the bottle. Make sure to wrap tight and even all around so that your bottle won't have any crazy holes. It may have some imperfections….but that gives it character! *wink*
- With constant wrapping it took me a good 10 minutes to get towards the top. I was watching DVR….us women need to multi task at all time!
- Glue the end and let dry!



Cool idea! Seems like it might work a little better if you use a gluestick on the bottle first. I think ill try it that way.