Coffee Can Twig Vase DIY
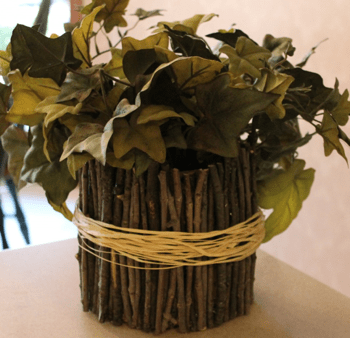
I get SO bored with having the same centerpieces each fall and winter. When I saw something similar I just had to recreate it. A great centerpiece and even better conversation starter around the table!
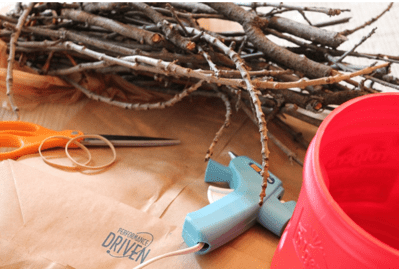
Coffee Can Twig Vase Supplies
:: Brown Newspaper Bag
:: Coffee Can*
:: Twigs
:: Hot Glue Gun
:: Scissors or Lawn Hand Clippers
:: Rubberbands
:: Greenery, Raffia, or Ribbon
*Most cans will do but a coffee can is a great size for a 6 person table.
DIY Steps
{Step 1} Cut the paper bag the size of the can and wrap it around. This will blend any holes between the twigs. Rubber band then hot glue it to stay
{Step 2} Cut twigs to the desired length. As long as the twigs are even around the bottom, feel free to make the twigs as creative as you would like around the top.
{Step 3} Start hot gluing the twigs vertical all around the coffee can. Once you have one layer done you may need to fill in some larger gaps with a second layer. I only had to put a second layer in a few random spots.
{Step 4} Let the can and twigs dry then wrap ribbon or rafia around. This will help to support the twigs and add some dimension to the piece.
{Step 5} Fill with anything you would like. Greenery is always nice in the gray of winter for me.
Project Cost
All supplies where from around the house. The only real expense you may have would be the few glue sticks you go through. Always pick up extras during back to school time for a mom project too!
If you have any questions, leave a comment so I can help out.
I would love to see any copycat pics if you make this!
Coffee Can Twig Vase DIY
A beautiful frugal home decor piece with items you have laying around the house.
Ingredients
- Brown Newspaper Bag
- Coffee Can
- Twigs
- Hot Glue Gun
- Scissors or Lawn Hand Clippers
- Rubberbands
- Greenery, Raffia, or Ribbon
Instructions
- Cut the paper bag the size of the can and wrap it around. This will blend any holes between the twigs. Rubber band then hot glue it to stay
- Cut twigs to the desired length. As long as the twigs are even around the bottom, feel free to make the twigs as creative as you would like around the top.
- Start hot gluing the twigs vertical all around the coffee can. Once you have one layer done you may need to fill in some larger gaps with a second layer. I only had to put a second layer in a few random spots.
- Let the can and twigs dry then wrap ribbon or rafia around. This will help to support the twigs and add some dimension to the piece.
- Fill with anything you would like. Greenery is always nice in the gray of winter for me.

