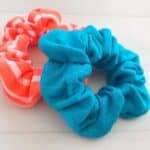
DIY Scrunchies
This tutorial will walk you through how to make a scrunchie with a needle and thread!

If you're like me, you don't have a sewing machine. To be brutally honest: I did very bad in my high school Home-Ec class. I vaguely remember the arm of a sweatshirt being misplaced to my lower side. It was bad.
I haven't touched a sewing machine since. I've never had a reason to and still haven't found one. I have purchased sew-on patches for our boys when they were younger to place over holes in jeans. If something needs mending, I pay a seamstress. But we rarely need things mending.
I do see the value in owning a needle and thread. Like for the little holes that our puppies made when they would suck on our down feather blanket. We had no idea that their suckling turned into biting at some point. The down feathers flying around our bedroom was evidence that some foul play had occurred.
Since scrunchies are making a comeback from my 90's big “Lion King” curly hair days, I want to share this fun and easy DIY to make your own scrunchies at home. No sophisticated materials are needed for this except needle and thread.
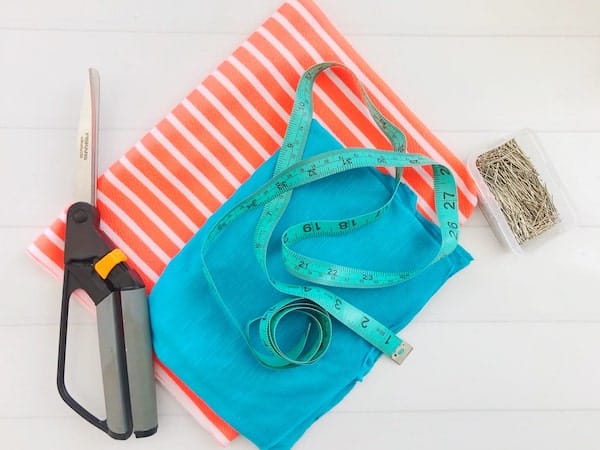
DIY Scrunchies Supplies
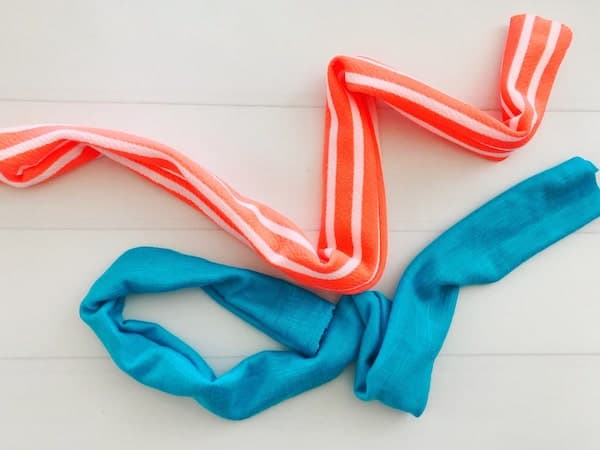
- 1/4” yard, Knit Fabric
- 1/4” Elastic
- Sewing Pins
- Fabric Scissors
- Needle and Thread
- Sewing Machine (optional)
How to Make Scrunchies
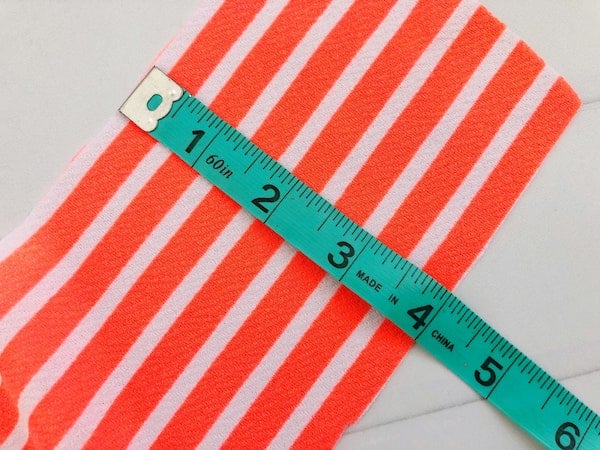
- Measure and cut a 4” x 22” piece of fabric.
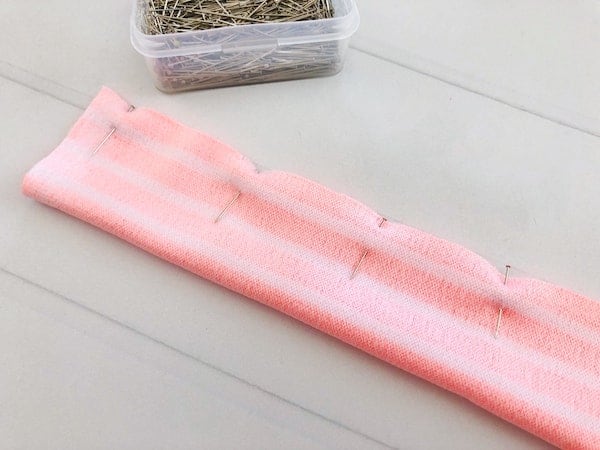
- Fold your fabric strip in half lengthwise with the print sides facing each other.
- Pin your fabric together if need be.
- Sew along the raw edge length, leaving a 1/4” seam allowance.
- Turn the tube inside out using your fingers.
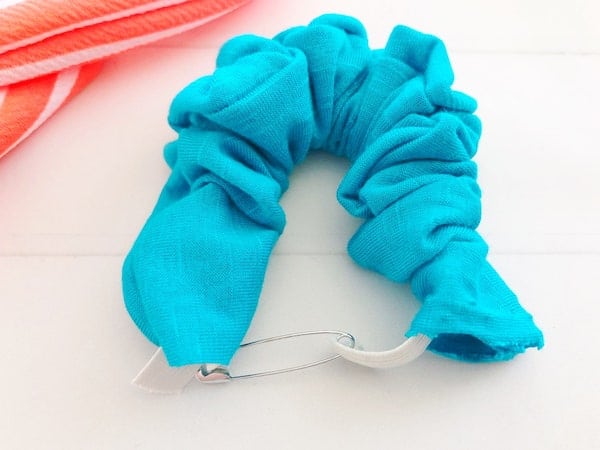
- Measure and cut a 8” piece of elastic, attach a Bobby pin at one end and slide through the tube holding the opposite end of elastic so it doesn’t slide through.
- Pin and see the two ends of elastic together.
- Fold one end of your fabric inside the tube about 1/2” and tuck the unfolded end inside the tucked end.
- Pin if need be, hand stitch or use a sewing machine to close the ends together.
Honestly, if you wanted to get rid of the needle and thread entirely you could probably use sewing tape (like this). Let me know if you do use the sewing tape and how well it holds up in daily use in your hair!
Also, if you have a hard time finding elastic in your store or online, I think really thin hair ties like these (or ones you find at Dollar Tree), would work as well. I saw someone mention trying that on a face mask, and it is the same idea.
How to Make Scrunchies
Ingredients
- 1/4” yard, Knit Fabric
- 1/4” Elastic
- Sewing Pins
- Fabric Scissors
- Needle and Thread
- Sewing Machine (optional)
Instructions
- Measure and cut a 4” x 22” piece of fabric.
- Fold your fabric strip in half lengthwise with the print sides facing each other.
- Pin your fabric together if need be.
- Sew along the raw edge length, leaving a 1/4” seam allowance.
- Turn the tube inside out using your fingers.
- Measure and cut a 8” piece of elastic, attach a Bobby pin at one end and slide through the tube holding the opposite end of elastic so it doesn’t slide through.
- Pin and see the two ends of elastic together.
- Fold one end of your fabric inside the tube about 1/2” and tuck the unfolded end inside the tucked end.
- Pin if need be, hand stitch or use a sewing machine to close the ends together.
Notes
Try sewing tape (like this) if you want to ditch the needle and thread entirely. You could also use hair ties like these (or ones you find at Dollar Tree) if you can't find elastic.
Disclosure: This post contains a link to an affiliate and support this site. See my Disclaimer Policy for additional information.