Fall Decorating: Witch’s Broom
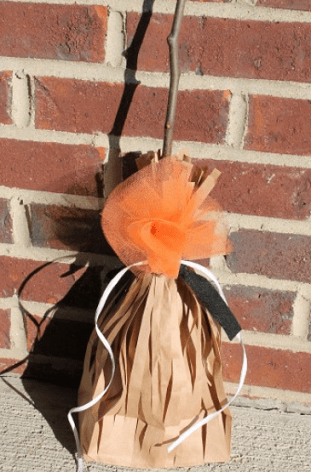
This is a cute craft to decorate for fall or use as a treat bag for the kids. It is super easy for all ages but the kids will love the treats!
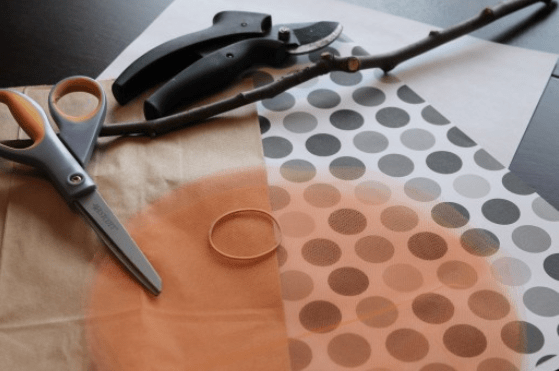
Witch’s Broom Supplies
:: 2 Brown Lunch Paper Bags
:: Scissors
:: Rubber band
:: Stick
:: Trimmers
:: Decorations to “Pretty Up the Bag” (Scrapbook Paper, Ribbon etc)
:: Goodies to Put Inside the Bag
DIY Steps
{Step 1} While the paper bag is folded, cut small slits about ¾” apart starting from the opening of the bag. Cut down to the bottom but be sure not to cut through the bottom or your “broom” will fall apart.
{Step 2} Open up the cut “broom” bag and place second bag inside. This will keep all of your goodies inside.
{Step 3} Add your goodies or paper to fill the inside bag.
{Step 4} Gently gather both tops of the paper bags and secure with a rubber band.
{Step 5} Poke the stick through the rubber band along with the tops of the bags to give the illusion of a handle.
{Step 5} Decorate your broom with ribbon, paper or even tulle to create your desired look!
Project Cost
This is a pretty inexpensive project and I had everything around the house. You should have everything as well but you may need to purchase the lunch bags and some candy. If you do not want to create the treat bag, you can fill with newspaper for a fall decoration.
You can purchase lunch bags in your local grocery store for under $2 for 50 bags. Also, you can purchase candy for around $2 a bag and there should be coupons in your inserts as well as coupons.com to save event more. You will be able to find a stick pretty easy if you have trees in your yard and us scrap ribbon and papers to decorate.
PrintFall Decorating: Witch's Broom
Fall Decorating: Witch's Broom
Ingredients
- 2 Brown Lunch Paper Bags
- Scissors
- Rubber band
- Stick
- Trimmers
- Decorations to “Pretty Up the Bag” (Scrapbook Paper, Ribbon etc)
- Goodies to Put Inside the Bag
Instructions
- While the paper bag is folded, cut small slits about ¾” apart starting from the opening of the bag. Cut do
- Open up the cut “broom” bag and place second bag inside. This will keep all of your goodies inside.
- Add your goodies or paper to fill the inside bag.
- Gently gather both tops of the paper bags and secure with a rubber band.
- Poke the stick through the rubber band along with the tops of the bags to give the illusion of a handle.
- Decorate your broom with ribbon, paper or even tulle to create your desired look!

