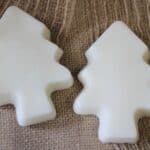
Homemade Shea Butter Soap Recipe
This recipe is fairly quick and easy and mostly consists of stirring and microwaving. Hopefully you’ll find it simple and be able to duplicate it and make your own versions too.
Ingredients
Scale
- Silicone molds for smaller soaps, or 2 larger molds like these tree shaped silicone molds
- 8 to 12 oz. shea butter soap base
- 1 tsp. sweet almond oil
- 4 drops Cedarwood essential oil
- 6 drops spearmint essential oil
- 6 drops White fir essential oil
Instructions
- First you will need to chop up the soap base into smaller squares. The tricky part is knowing how much to use because depending on the molds you chose it can vary a bit. I normally end up with about 10 oz. of soap once it’s melted down for 2 of the bigger molds, and this amount makes about 4 to 6 of the smaller sized molds. It is best to do this amount at a time and not double it, as it’s harder to melt it consistently and keep the soap from getting all clumped up, so if you are making more that this, just do one batch at a time.
- I chop the soap and then lay a piece or two into each mold, to see how much I need. Then I still add another 2 or 3 squares of it and this always comes out just about perfect.
- Now, place those pieces of soap into a glass measuring cup or mixing bowl and microwave them for about 30 seconds. They will be about half-melted, so then take a rubber spatula and turn them and stir, then place back into the microwave again for 30 more seconds.
- Measure out your sweet almond oil and add it to that melted soap when it comes out. Stir well and then microwave for 20 seconds.
- At this point there should be no lumps in the soap and you will likely need to scrape some soap off the sides of the bowl to get it to melt back in.
- Now you can add in your essential oils to the mixture.
- As you do this, the soap will solidify some, but don’t sweat that.
- The Cedarwood oil is a thicker one and it takes a few seconds to come to the top and start dripping, but the other two are the opposite and will flow too fast if you aren’t careful in your pouring, so don’t tip those bottles fully.
- Count out the drops and then if you can, mix them in to the soap. If it’s too solid to do that, microwave it for 10 or 15 seconds. Get the oils mixed in well and be sure to get all the soap mixture involved, scraping the sides and getting down in the bottom of the bowl too.
- Now you can do one last microwave run and 20 seconds should do it. If the soap looks all smooth, don’t even bother to stir it, just go ahead and pour the soap into your molds. They should be filled up as far as you can go, to just below the top edge if you have enough soap base to do so. The beauty of using these molds is, the top side that people will really see is the one that is face down in the mold and it will come out nice and smooth, but there’s nothing to tell them if you didn’t quite fill up the mold fully. Just pour it smoothly and slowly into the mold.
- If it happens to solidify too much, re-melt it again for a few seconds and then pour it again.
- Now the last step in the process is to let the soaps cool all the way off. Just leave them on the counter at room temperature until they are cooled. To try them out and see if they are ready, feel the center of the mold. If it is still warm, give them a bit longer. If not, go ahead and carefully peel the mold from the top corner and the soap should easily pop out of the mold for you.
Find it online: https://savingslifestyle.com/shea-butter-soap-recipe/
