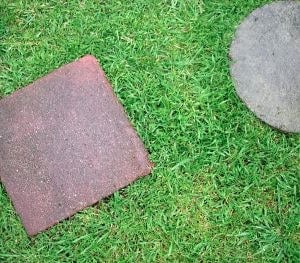
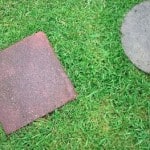
How to Make Stepping Stones
I have made Stepping Stones before, but bought the expensive kits from craft stores. I read in a magazine a while ago that these can be made with good ole' cement and a box (duh…see, I'm sooo not crafty!). So, this week, here's what you need to get to make your Stepping Stones:
- 5-Gallon Bucket or something to hold the cement ($5)
- 10 Pounds of Quick Setting cement ($5-$10 depending on variety)
- 4 Cups of Water (FREE)
- 2 Wooden Paint Stirrers or Sticks (FREE)
- A box lid or whatever shape mold you want to use for your stone. We actually have our molds from using the boxed stone kit before so I'll be using those. (FREE)
- Pencil for writing in the concrete. (FREE)
- Toys, Trinkets, Stones – whatever you want to use to decorate the stone ($2-$5)
Here's what you'll need to do:
- Mix the cement and water with a paint stirrer or stick until it's like an oatmeal consistency (double check the instructions on the cement bag/container in case it's different). Obviously, don't inhale the stuff – it's dangerous :-)
- Pour the mixed cement into your box lid or mold for the stone.
- Use the other paint stirrer or stick to flatten the cement in the mold (so it's nice and smooth).
- Let the cement hardent for 5-10 minutes (or whatever the instructions state on the bag, some types are different).
- Press your hands or feet or whatever human body part you're gonna put in it and wash off immediately. If you don't get the impression you want the first time, just smooth the surface out again and try over (as long as it's not set too much).
- Begin to put the trinkets and writing in it.
- Let the mold set for at least 48 hours. If you take it out too soon, the cement won't be set and it could fall apart!
Our total OOP for this one was around $10 thanks to a Lowe's coupon!
We are going to be doing our Stepping Stone tomorrow so daddy can help! So, I'll update this with pics then. Be sure to send me any pics you have for this craft and the others so we can see how your summer survival projects turned out too! And, if you don't get it done this week, just send me the pic when you do complete it! It'll be neat to see everyone's works of art!
PrintHow to Make Stepping Stones
How to Make Stepping Stones
Ingredients
- 5-Gallon Bucket or something to hold the cement ($5)
- 10 Pounds of Quick Setting cement ($5-$10 depending on variety)
- 4 Cups of Water (FREE)
- 2 Wooden Paint Stirrers or Sticks (FREE)
- A box lid or whatever shape mold you want to use for your stone. We actually have our molds from using the boxed stone kit before so I'll be using those. (FREE)
- Pencil for writing in the concrete. (FREE)
- Toys, Trinkets, Stones – whatever you want to use to decorate the stone ($2-$5)
Instructions
- Mix the cement and water with a paint stirrer or stick until it's like an oatmeal consistency (double check the instructions on the cement bag/container in case it's different). Obviously, don't inhale the stuff – it's dangerous :-)
- Pour the mixed cement into your box lid or mold for the stone.
- Use the other paint stirrer or stick to flatten the cement in the mold (so it's nice and smooth).
- Let the cement hardent for 5-10 minutes (or whatever the instructions state on the bag, some types are different).
- Press your hands or feet or whatever human body part you're gonna put in it and wash off immediately. If you don't get the impression you want the first time, just smooth the surface out again and try over (as long as it's not set too much).
- Begin to put the trinkets and writing in it.
- Let the mold set for at least 48 hours. If you take it out too soon, the cement won't be set and it could fall apart!


I made a stone like this last year for mother’s day, and we used letter magnets to write mom a message on the stone. I definitely recommend wearing gloves when working with the cement. The chemical that makes it ‘Quick Setting’ really irritated my skin. But, the stone turned out great!
Abbie – great advice! We actually have letters from the previous stone kit we made, but I never thought of magnet letters. Thanks for leaving a comment!