DIY Pinata
Learn how to make your own pinata – easy and inexpensive!
Ingredients
Scale
- 8 Sheets, Purple Tissue Paper
- 8 Sheets, Pink Tissue Paper
- 1 Cardboard Box*
- Clear Packing Tape
- Elmers Glue
- Character Picture**
Instructions
- Cut 4 sheets of each colored tissue paper. Unfold the 4 sheets, then take 2 sheets at a time, and cut them into 1.5-2-inch strips. Now cut half cuts into those strips to make the fringe look.
- Decide how you want the pinata to hang for hanging. Put two holes for thick twine or yarn that will hold the rope for hitting. Place two holes on each side and string it through and tie it so that it’s strong enough to support the rope. Once the twine or yarn is in place, use the packing tape to close the flaps on the box.
- Cut 3 slits onto the top of the box so you can stuff the candy inside.
- Start with any corner that you want in the front of the pinata. Take one of your strips, hold it up to the box and cut it where it will only over lap the sides a little bit then cut it there. You will add Elmer’s glue to the strip where the flap is not at. Apply the strips to the box at the tip of the corner. Continue to rotate the colors until you’re 1/4 of the way down.
- Move to the next corner and repeat until you have all the corners complete. Don’t worry if you go into the sides of the pinata we will fix those later. You can use your Plate or Balloon as a guide to see how far down you would like to go down for your corners.
- Once your corners are complete, go to the open areas between your corners and again fill in the area rotating colors so that all areas are covered. Leave the area blank for now where the balloon or plate will go.
- When you start on the back, you will start on the top and just keep rotating the colors all the way to the bottom. The longer areas you will need to use a strip and a 1/2 to 2 strips to cover the area using the same colors.
- Now we’re onto the sides. If you have overlapped strips on the side they will be dry now. Lift them up a little and cut off the excess so that you can fill in the sides of the pinata and they will lay flat.
- Start on the side where your slit are for the candy to go in the pinata. Start to rotate your strips on the side away from you. When you are to your flap, you will use smaller strips in front of the slit then cut strips that will cover the opening and give it room to move up and down. Before you glue your first one on, hold it tight onto the opening and make sure it won’t break when your opening and closing your opening. If it does break then use a little longer piece. To save you time use that piece as a template for the rest of your strips so you won’t have to measure each strip. Then glue the strips with rotating colors.
- Finish the other sides of the pinata in the same way that you did the side with the slit. Your pinata is now complete with all your strips.
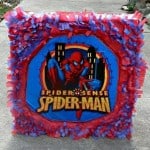
- If you’re using a helium balloon you will cut the balloon to use in the middle of your pinata and just use the top character part of the balloon to add to your pinata. If your using a plate that matches your theme you won’t need to cut it at all. You will now add glue around the outer edge and center of the object you are using. Then put it into place and smooth it out.
- If you have space around your balloon or plate that is showing your cardboard box then rotate strips to fill them in. Once this step is complete, you will want to take strips to cover the edges of your plate or balloon. Take your strip and measure around the outer edge. You can use smaller strips if it’s easier for you, and then go all the way around the outer edge.
Find it online: https://savingslifestyle.com/diy-pinata/